How-to
How to Sharpen Wood Carving Tools: Gouges, V-Tools and Chipped Edges
Published
As an Amazon Associate we earn from qualifying purchases. This does not change our picks. Affiliate disclosure
New to Prime? Try Prime free for fast, free shipping on eligible items.
Short answer
Sharpen a gouge by rolling it on the stone so the whole outside bevel is rubbed from corner to corner, at a published bevel angle of 15 to 25 degrees. Clear the inside with a slip stone, then strop. A V-tool is sharpened as two chisels plus the keel where they meet. A chipped edge is rubbed back square first, then the bevel is rebuilt.
Gear for this job
All 7 picks comparedSharp Pebble grooved stones, 400 and 1000 grit
See price on AmazonSee it on AmazonFlexcut SlipStrop PW12 with Gold compound, 1 oz
See price on AmazonSee it on AmazonBluvizo contoured 400/1000 stones with bamboo base
See price on AmazonSee it on Amazon
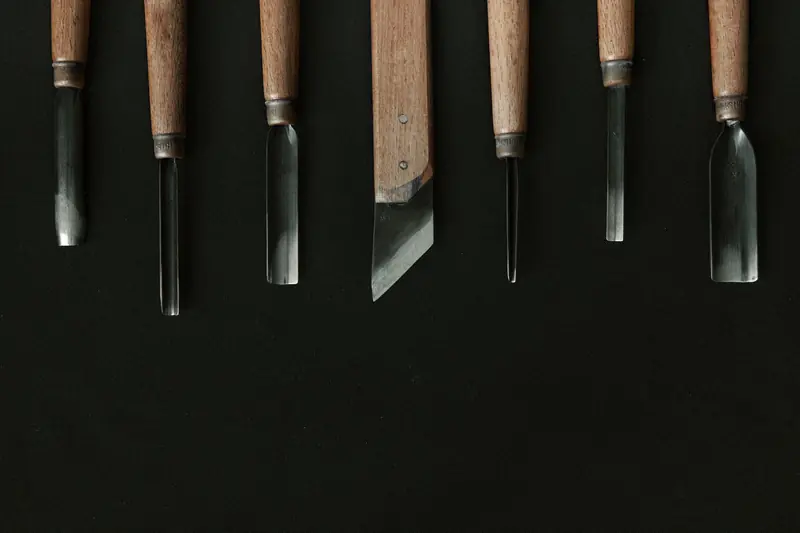
This is for carvers who can sharpen a knife but lose the shape of a gouge on the stone. A gouge has an outside bevel, sometimes a short inner bevel, and an edge that must stay straight when seen from the side. What decides the outcome is even metal removal across the whole curve, so the edge stays straight and both corners stay on the tool. Stones are for shaping and repair. Day-to-day sharpness comes from the strop. The angles, grits and methods below are given with the source that publishes them.
What angle to sharpen gouges, chisels and V-tools at
Published figures sit between 15 and 25 degrees. Pfeil's guidance, quoted by Classic Hand Tools, is 17 degrees for softwood up to 25 degrees for hardwood. Woodcarving Illustrated gives a cutting angle of 15 to 20 degrees with an optional inner bevel of 5 to 10 degrees. A lower angle cuts with less force and dulls or chips sooner. The full table, with knives and hook knives, is the sharpening angle chart.
| Tool | Published angle | Source |
|---|---|---|
| Gouge, outside bevel | 17 degrees (softwood) to 25 degrees (hardwood) | Pfeil, quoted by Classic Hand Tools |
| Gouge, outside bevel | 15 to 20 degrees | Woodcarving Illustrated |
| Gouge, inner bevel (optional) | 5 to 10 degrees | Woodcarving Illustrated |
| Carving chisel | 15 to 20 degrees | Woodcarving Illustrated |
| Skew chisel | Bevels as a chisel, end skewed at about 45 degrees | Woodcarving Illustrated |
| V-tool wings | Each wing as a chisel: 17 to 25 degrees | Pfeil guidance for all its tools |
How to sharpen a gouge: rolling the outside bevel
The sequence below follows Woodcarving Illustrated's Tuning Your Tools, which shapes on a coarse India benchstone and finishes on a translucent Arkansas stone. A new tool that already cuts cleanly does not need it: Pfeil tools, for example, are sold sharpened and honed. Sweep numbers and widths are explained in the gouge sizes chart.
- 1
Find the cutting angle. Lay the gouge on scrap wood with the hollow side up, slide it forward and raise the handle slowly. The angle at which the edge first nicks the wood is the one to hold, normally 15 to 25 degrees.
- 2
Set the bevel on the coarse stone at that angle, with 1 corner of the edge touching the stone.
- 3
Move the tool along the stone and rotate the blade as it goes, so the stroke ends on the opposite corner. Every pass should rub the whole bevel, corner to corner.
- 4
Check the edge every few passes. Stop on the coarse stone as soon as the bevel is 1 even surface and the edge is a straight line with both corners intact.
- 5
Repeat the same rolling stroke on the fine stone until the scratches from the coarse stone are gone.
- 6
Strop the outside. Flexcut's method: pull the tool away from its edge on leather with compound, and roll the gouge as it is pulled so the entire edge is polished.
The inside: slip stone, inner bevel and burr
Work on the outside pushes a burr over to the inside of the sweep. Remove it with a slip stone, a small shaped stone that fits inside the curve. Woodcarving Illustrated rubs slipstones back and forth around the whole inside at a tight 5 to 10 degrees, which leaves a short inner bevel. Flexcut gets a similar result on the strop: tilting the tool slightly while the inside is stropped removes the burr and adds a slight secondary bevel that makes the edge more durable.
Spoon and bowl carver David Fisher describes the same finish on his gouges: a diamond cone slip for the slight inner bevel, then a very fine ceramic slip worked lightly on both sides of the edge until the wire edge is gone, then the strop.
How to sharpen a V-tool: two chisels and a keel
A V-tool is two chisels joined at an angle of 45 to 90 degrees, with 60 the most useful. Each wing is sharpened flat, like a chisel. The extra step is the keel, the line where the wings meet. A small hook is left at the point after the wings are done, and it has to come off. The sequence below follows Charles Berold's method in Woodcarving Illustrated, on diamond stones.
- 1
Square the end. Hold the tool upright on a 150-grit diamond stone and rub until small flat spots show along the edge. This brings both wings and the point into one plane.
- 2
Shape the wings. Lay 1 wing on the stone at about 15 degrees and rub, shifting finger pressure toward the places where more metal has to come off. Do the same on the other wing.
- 3
Work up through 250, 400, 600 and 1,200 grit. Wipe off the steel dust, look at the edge and repeat until the flat spots are gone on both wings.
- 4
Remove the hook. Set the point of the V flat on the 1,200-grit stone and rock the tool slightly from side to side.
- 5
Strop each wing at the same 15 degree angle and polish the inside of the V lightly. Then cut across the end grain of a scrap to test the edge.
How to fix a chipped wood carving chisel or gouge
A chip is not honed out from the bevel side. The edge has to go back past the damage first. This is the squaring step from the V-tool method: hold the tool upright on a coarse stone (Woodcarving Illustrated uses 150-grit diamond) and rub until the chip is gone and the end shows one continuous flat. On a gouge, do the same along the whole sweep.
Then rebuild the bevel at the tool's angle on the coarse stone until the flat at the edge just disappears, work up through the finer grits and strop. For a deep chip some carvers use a bench grinder. The Small Boat School's chisel repair guide gives the rule for that: the tool should never get too hot for your fingertips, and water keeps it cool. Its 25 degree grind and 30 degree micro bevel are bench chisel figures, not carving tool figures.
Note.Steel that turns dark blue at the edge on a grinder has lost its temper. Use a light touch, dip the tool in water often and stop as soon as the chip is gone.
Routine upkeep: strop before the tool goes dull
Once the bevel is right, the stones stay in the drawer. Flexcut's instruction is to strop when the tool begins to drag in the cut, and it warns that stones are too coarse for routine maintenance and scratch the polish. Pull the tool away from its edge, roll gouges as you pull, and use a shaped strop for the inside. The motion for knives is in how to strop a carving knife. Shaped strops and compound are compared in the strop guide.
How to tell a gouge or V-tool is sharp
The job is done when the tool passes a cut test, not when a stroke count is reached. Check the edge first, then the cut it leaves in the wood.
- No flats on the edge: look straight at the edge under a lamp. Flat spots and chips show as bright points. The V-tool method repeats the stones until they disappear.
- Polished facet: Woodcarving Illustrated's test is a cut that leaves a polished facet without scratches, one you could leave as the finished surface.
- End grain: cut across the end grain of a scrap, as the V-tool method does for its final test.
- Straight edge, both corners: seen from the side, the edge is one line and neither corner of the gouge has been rounded off.
Quick answers
Short answers on sharpening carving tools. Angles and grits are published figures from the sources named above, not measurements.
- How to sharpen whittling tools? Knives: flat bevel on a stone, then a strop. Gouges: roll the outside bevel on the stone, clear the inside with a slip stone, then strop.
- How to fix chipped wood carving chisels? Rub the end square on a coarse stone until the chip is gone, rebuild the bevel at 15 to 25 degrees, refine on finer grits, then strop.
- How to fix a chipped chisel on a grinder? Grind the edge back square past the chip, then regrind the bevel. Keep the steel cool enough to touch: dark blue steel has lost its temper.
- What grit for sharpening wood carving tools? One published V-tool sequence runs 150, 250, 400, 600 and 1,200 grit diamond stones, then a strop. Routine upkeep needs only the strop.
- Do new gouges need sharpening? Not always. Pfeil tools are sold sharpened and honed. Test a new tool on end grain before putting it on a stone.
What you need for this
- See price on AmazonAmazon
Sharp Pebble grooved stones, 400 and 1000 grit
From Best Sharpening Kits for Wood Carving Knives, Hook Knives and Gouges
- See price on AmazonAmazon
Bacher leather strop 12.6 in, 4 compounds and balm
- See price on AmazonAmazon
Flexcut FR405 deluxe palm gouge set, 9 tools
From Best Wood Carving Gouge Sets: Palm Tools for Hand Carving